I recently did a guest post for the BowTiedBull Substack, diving into how tokens work and common user pitfalls. One of the most requested followups was how to manually revoke token approvals without Etherscan, in case one of the helpers like Etherscan’s approval tool or Revoke.cash went down.
The answer to that question is simple, although not necessarily easy. We need to find a way to generate a well-formed approve transaction, sign it with our private key, and transmit it to the blockchain. For those with programming knowledge, this is relatively easy. It’s one of the first things taught in most blockchain tutorials.
However, I am adamant that you shouldn’t have to know how to code to be able to participate in crypto. (See: How To Read Smart Contracts Without Learning Solidity) So, I dug around, and found the easiest way to revoke approvals that doesn’t involve Etherscan. Yes, it does involve a third party service. However, this third party is unlikely to be overloaded during a panic/active hack.
Buckle up, this will unavoidably be a little technical. Don’t worry, you can do it!
Overview
Here’s a high level overview of what we’re trying to do.
- Find the contract address of your token
- Find the address you want to revoke approval for
- Find the interface of the token we are revoking
- Open Remix IDE
- Create a file for the interface
- Compile the file
- Switch Remix to using our Metamask as a provider
- Prepare the transaction
- Send the transaction
We’ll step through each of these along the way. Do note: I will do this guide for ERC-20 tokens only, but the steps are almost identical for ERC-721 NFT tokens.
What Is Remix?
Remix is an in-browser IDE (integrated development environment, aka code writey place). Remix is the lynchpin of this approach for several reasons. It’s in browser, so you don’t have to deal with setting up a development environment (80% of the pain of coding). It provides a nice interface for sending transactions. And crucially, it lets us send transactions using Metamask. This avoids the pain of setting up a provider and doing key management.
What Is An Interface?
An interface is a special pared-down smart contract that defines the allowed ways to interact with a contract, but no source code. This is used to tell other programs how to interact with a given smart contract, where they don’t need to know how it works.
As a crude example, the interface of a McDonalds (my current employer) is: order and pay, then receive burger. You don’t need to worry about what happens behind the scenes to create the burger, only that if you walk up to the counter, hand them your money, and tell them you want a #1 combo, you will receive one.
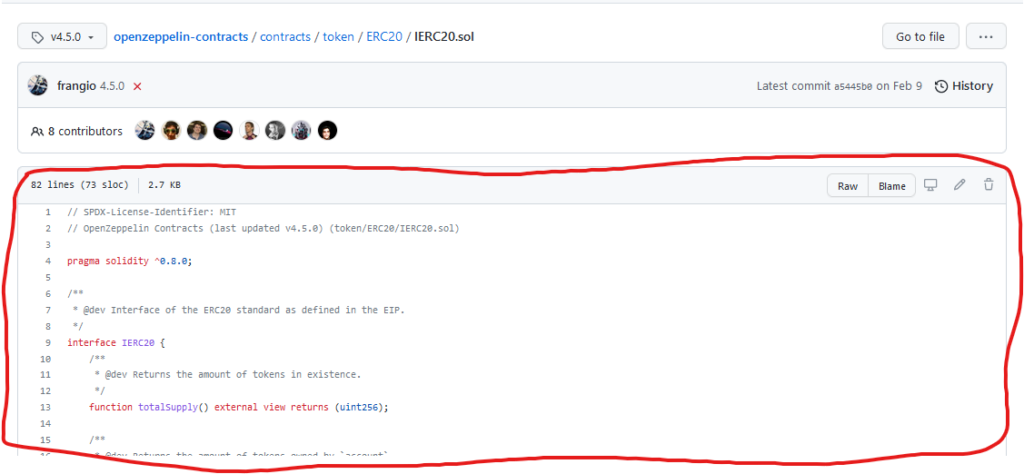
Particularly in our case, we only need to care about the token interface itself. If I want to revoke access for an address to spend my OHM, which is an ERC-20 compliant token, I don’t need to know the interface for all the code built into OHM for staking, rebasing, etc. Just the ERC-20 standard interface. Visually, that looks like this.

Finding Addresses
You need two addresses:
- The token’s smart contract (“token”)
- The address you want to modify your approval of (“target”)
You’re probably going to need Etherscan for this one. If that’s not available, you can retrieve the token address from Metamask by clicking on the token -> dots in upper right corner -> token details. You’re on your own to retrieve the target address.
Finding The Interface
The easiest way to do this is to take one of the OpenZeppelin standard interfaces. I’ll link to the OpenZeppelin Github here for the ERC-20 and ERC-721 interfaces. Copy all the code for whichever interface is relevant to you. I’ll just demo ERC-20.
Setting Up Remix
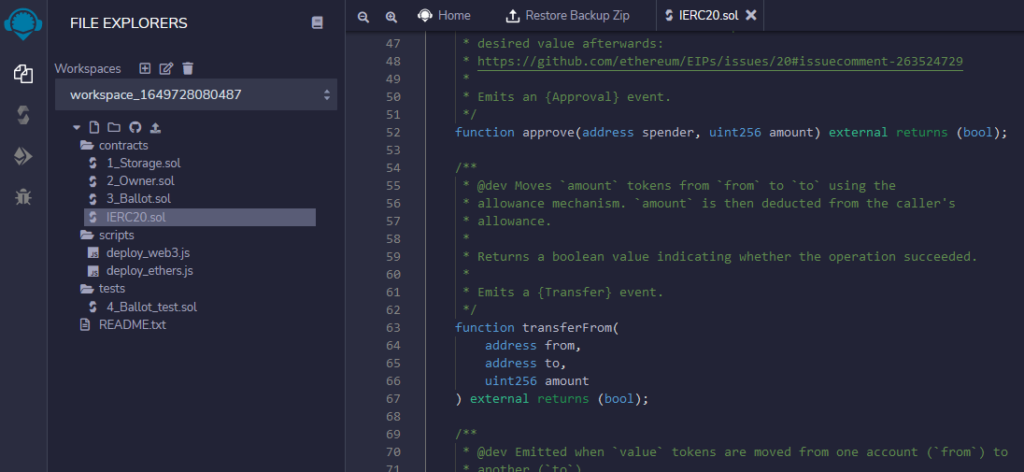
Go to Remix. You will see something like this.

Make a new file in the “contracts” folder, and name it IERC20.sol. Paste the entire contents of the IERC20 interface from Github into that file.
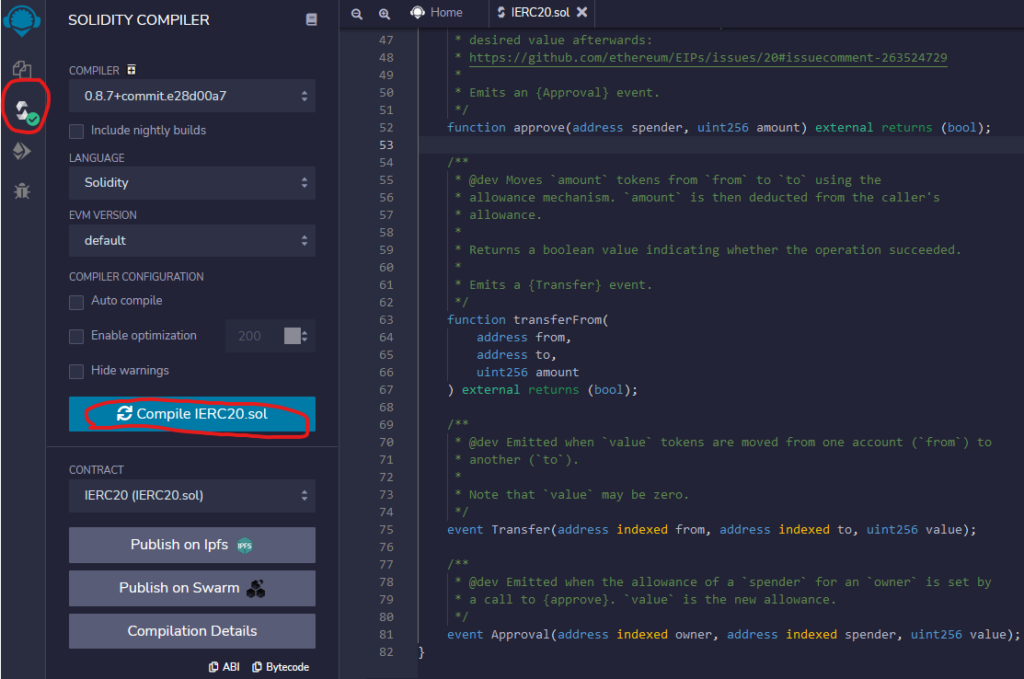
Next, with the IERC20.sol file open, go to the Compiler tab, and hit Compile.
Connecting To The Contract
Now, go to the Deploy and Run tab. Click the dropdown that says “JavaScript VM (London)” and change it to “Injected Web3”. Connect your Metamask to the site when prompted.
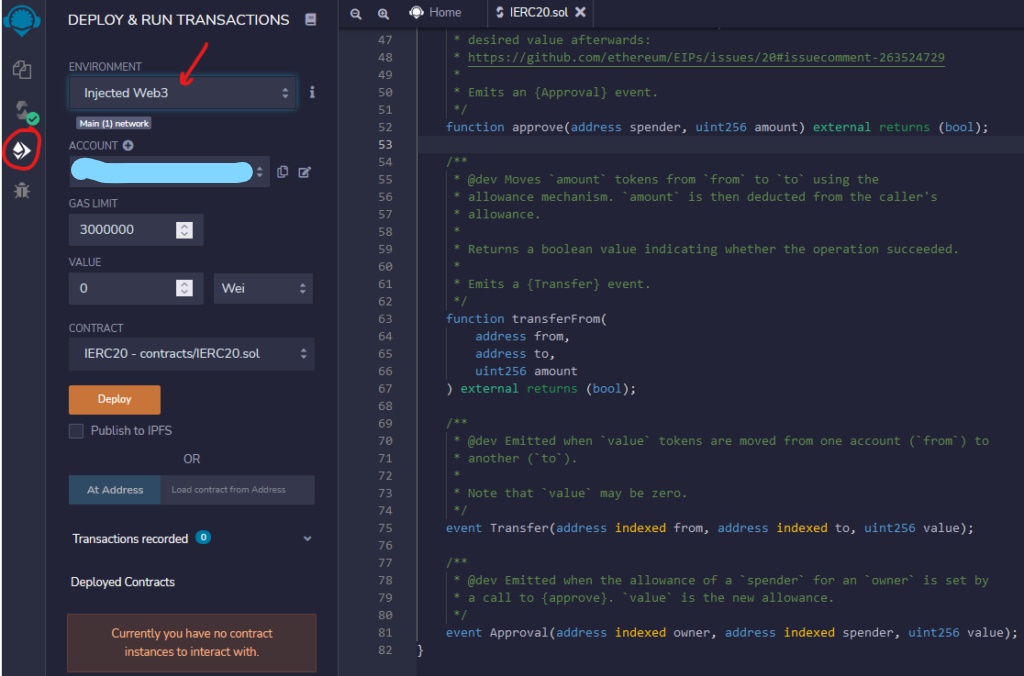
Note that the contract box says IERC20. This is what we want. Copy your desired token address and paste it into the “Load contract from Address” box. Then click the blue “At Address” button. The contract will pop up in “Deployed Contracts”.

Sending The Transaction
For my example, I’m revoking access for SushiSwap to spend my LINK tokens. Link Marines never sell.
Hit the sideways caret and expand the deployed contract. You will see the orange “approve” button. Expand that using the dropdown.

Fill that in with the target address in “spender” and the “amount” field as 0. Confirm everything is right, then hit the orange “transact”. Remix will pop up a message box. Review that, then click “confirm”. It will then pop your Metamask to sign the transaction.

Confirm this here as per usual. Wait for your transaction to be mined, and voila! Approval revoked.
Wrapping Up
Hopefully that wasn’t too rough! The key takeaway here revolves around the interface. Interfaces are central to every smart contract interaction on the blockchain. Knowing your token standards lets you use the standard interfaces without having to worry about a specific token’s code.
Remix is a very powerful tool, and one of the most beginner-friendly ways to dabble in smart contract programming. Highly endorsed.
Finally, if you need to revoke access for an NFT, you need to use the ERC-721 interface instead of the ERC-20. You’ll also need the token ID of your NFT. That will be entered when you fill in the transaction information, there will be an additional slot for tokenId.
Knowing how to revoke token approvals without Etherscan gives you greater reliability and better security in the event of a crisis. I hope this helps you stay safe out there, anon. Good luck.

